Dreamweaver CS5 Website Header
Now let’s create our website header. This is the top portion of the website with the logo and masthead.
As per our layout it looks like this:
![]()
We will need to create a div called ‘header’ and a style also by the same name ‘header’.
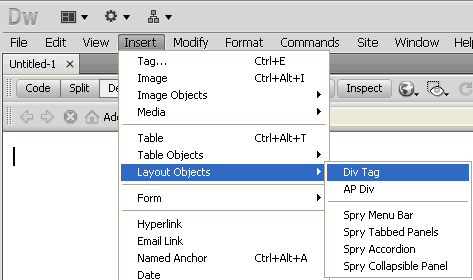
- Select ‘Insert’
- Select ‘Layout Objects’
- Select ‘Div Tag’
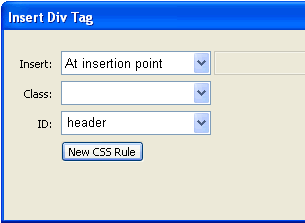
Since we are going to have only one header on the page, we can make this an ID.
- In the Insert Div Tag Window enter ‘header’ next to ID.
- Now click on the ‘New CSS Rule’ button.
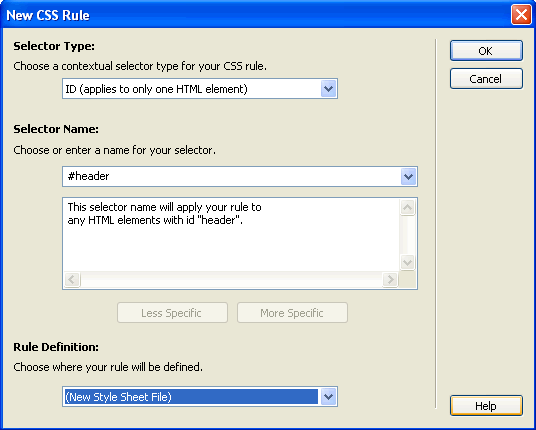
In the New CSS Rule window:
- You will see ‘#header’ is automatically entered by Dreamweaver.
- Select ‘New Style Sheet File’ from the bottom drop down menu.
- Click the OK button
- Give the file name ‘style’ for the stylesheet.
- Click the ‘Save’ button.

You have now created a stylesheet file names style.css and saved it in your site’s folder.
In the ‘Style Rule Definition for #header in style.css’ window we can now specify the style properties of the header div tag. We can specify the background color, dimensions and borders. We can also specify the path to the logo image as well as it’s position in this style.
- Enter the following details for Background, Box and Border:


- Click the ‘OK’ button.
The header div and style has been created and looks like this:
- Delete the text ‘Content for id “header” Goes Here’.
If you look at the CSS Styles panel, you will see the header style.

To edit the header style:
- Right click the ‘header’ style
- Click ‘Edit…’
- This will open the “CSS Rule Definition” window where you can edit the style.

- Save the template.
Dreamweaver CS5 Tutorial
- Dreamweaver Cs5 Tutorial
- Define Site
- Dreamweaver CS5 Template
- Dreamweaver Website Layout
- CSS Layout – Dreaweaver CS5
- Dreamweaver CS5 Website Header
- Dreamweaver DIV/ CSS Layout
- Dreamweaver Menu
- Editing Styles in Dreamweaver
- Editable Regions in Dreamweaver Template
- Webpages in Dreamweaver
- Linking to webpages in Dreamweaver
- Styles for text links in Dreamweaver
- Web Page Content
- Text Styles in Dreamweaver
- Heading Styles | Dreamweaver
- Contact Forms | Dreamweaver
- Form Styles | Dreamweaver
- Test Website | Dreamweaver
- FTP/ Upload Files to Hosting Server | Dreamweaver
Posted in Dreamweaver | No Comments »


