Logo Design in Flash Catalyst
Logo design in Flash Catalyst can be done using the Shape, Rectangle/ Ellipse and Line tools. If text is part of your logo you can use the Text tool as well.
For this tutorial let us use the star shape (found by clicking on the tiny triangle below the shape tool (triangle icon).
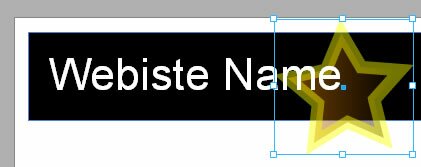
We want the star to be yellow in color and appear behind the ‘Website Name’ text.
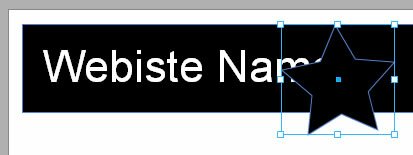
If we draw a star it will be placed on top of the text thus hiding a portion of it.
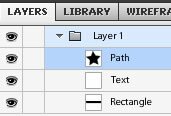
You will notice that the Star is in a layer above the Website Name.
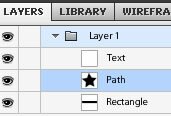
To move it behind we can simply move the star layer (titled Path) below the ‘Website Name’ layer (titled Text).
You can rename these layers by double clicking on the layer name and entering the name of your choice. This will help you easily identify layers later.
You will see that the star is now behind the Text and all the text is visible.
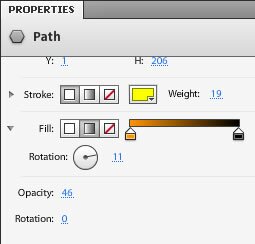
Change the color of the star by selecting it (using the Select tool) and changing the Fill color in the Properties panel to yellow.
If we want a gradient we can click on the middle icon next to Fill. The color box next to it will turn into a slider with shades between a start and end color. These colors can be changed by clicking on the start color box and end color box below the slider. The color picker will appear and the desired color can be selected.
Clicking on the triangle to the left of ‘Fill’ will open up a rotation tool where you can specify the direction of the gradient.
The Stroke (outline) color can also be changed and the thickness of the outline specified in the Weight.
Reducing the Opacity will make the star see-through and allow the background to show through.
Now that we have designed our logo we can create the rest of the webpage layout…
Flash Catalyst Tutorial
- Flash Catalyst Tutorial
- Create a New Project
- Flash Catalyst Workspace
- Flash Catalyst Tools
- Flash Catalyst Webpage
- Logo Design in Flash Catalyst
- Webpage Layout in Flash Catalyst
- Buttons in Flash Catalyst
- Pages/ States in Flash Catalyst
- Interactivity in Flash Catalyst
- Transition Effects in Flash Catalyst
- Publish the Flash Catalyst Website
Posted in Flash Catalyst Tutorial | No Comments »

